Delicate filter coffees and bold espressos aren’t solely found in coffee shops. Brewing coffee can be done from the comfort of your own home, too. It’s an enjoyable pastime that has delicious results. Plus, you get to learn something new every day.
We’ve put together a guide on how to brew the perfect cup of coffee at home, whether you’re new to specialty coffee or a seasoned pro. Read on to find out how to make coffee at home and discover some top tips to get the best results.

IF YOU’RE NEW TO HOME BREWING
Whether you’re taking your first steps into making coffee at home, or have a fair share of coffee knowledge, there’s always something to learn.
Brewing Your Coffee
First, what are you using to brew your coffee? There are a few different methods you can choose which are easy to use, and will produce a good cup of coffee.
The French press, also named the cafetière, is a classic brewing method option. It’s an immersion method which is a great first step into making good coffee at home. The French press provides a bold flavour with a heavy body, so coffees with a medium to dark roast, with chocolate or nutty flavour notes, would work well. The coffee needs to be ground coarsely for brewing with French press, similar to the size of rock salt.
A good start for a brew ratio is 35 g/1.2 oz of coffee to 475 ml/16.7 fl oz of water. This should make two cups of coffee. You can also alter this recipe depending on your taste. If the coffee is strong, you can try using less coffee, or more water. Or, if the coffee tastes too weak, you could increase the coffee dose, or reduce the amount of water. If you notice a sourness in your cup, try grinding a little finer. If it tastes bitter, you can try grinding a little coarser.
Fill up your French press with some boiling water, this will heat up your French press which will help keep the coffee warm while it brews. Pour this water out and place the French press on the scales. Tip in your coffee grounds. Next, pour freshly boiled water onto the grounds, place the lid on the French press and put a timer on for four minutes. Once the timer is up, lift the lid and stir the grounds using a wooden spoon, a metal spoon can crack the glass and interfere with the taste. Slowly push the plunger down and either serve into cups or pour into a decanter and enjoy.
If you’re looking to taste more nuanced flavours in your coffee with a medium body, the AeroPress is a good next step. Opt for a coffee which has more complex flavour notes so you can taste them in the cup (maybe citrus-like or with fruitier notes). The coffee needs to be ground quite fine, between espresso grind and French press grind, similar to caster sugar.
There are different ways to brew with the AeroPress. The standard method goes as follows: first, place the small circular filter in the plastic cap and use some hot water to wet the filter and cap. Assemble your AeroPress, screwing the filter into the chamber, and place the chamber on the scales. Tip the grounds inside the chamber, then pour on the boiling water. Quickly stir the coffee, then allow the coffee to steep for 90 seconds. Place the AeroPress on top of your cup or decanter, attach the plunger on top of the chamber and slowly press down, you will experience a bit of resistance, but keep pushing down. The freshly brewed coffee will drip down and produce your delicious brew.
You may also like Should You Grind Finer For Better French Press Coffee?
Top Tips For Choosing Coffee
It’s time to delve into the world of coffee. There are so many different coffees to choose from, but don’t let this be daunting, instead see it as an exciting journey.
Always check the roast date on the bag. Fresh coffee will make a lot of difference while brewing at home. As coffee is a food, it reacts with oxygen and becomes stale and loses its flavours over time. If you’re brewing a French press or AeroPress, look for a very fresh roast date, you can use it within a few days, and it will be at its best within that month.
It’s a good idea to try buying whole bean coffee. When coffee is ground, its surface area increases, giving oxygen more space to react with the coffee, meaning it becomes old much quicker. Therefore, pre-ground coffee will lose its freshness much faster than whole bean. Investing in a grinder means fresher coffee and more enhanced flavours. Manual grinders will allow you to get a better-quality coffee, for cheaper, but it will require more effort to use than electric grinders. So, think carefully about what’s important to you and your brewing routine.
Head to our top tips at the bottom of this article to read more on this.

IF YOUR FAVOURITE COFFEE IS A POUR OVER
This method using filters allows for a slow, drip brew. Gravity-driven drip coffees can accentuate the complex flavours in coffee, which is a popular method among baristas.
There are a few different options if you want to try a pour over. There is the Hario V60, the compact cone shape filter, which is defined by its V shape and 60-degree angle. The Chemex, which is a beautiful glass brewer and decanter all in one. Then there is the Kalita Wave, renowned by its ridges on the inside of the brewer.
The V60 requires a thin cone-shaped filter with one hole, and is perfect for expressing delicate fruity and floral flavours. It may take some time to learn how to use it with different coffees but it is great for experimenting. The Chemex requires larger and thicker filter papers and a coarser grind, the flavour is therefore slightly heavier than the V60. It can be slightly tricky to get consistency, but when brewed well, can have a very clean flavour. The Kalita Wave has a flat bottom with three holes for the drip-brew, and ridged edges in the brewer, this all helps with the brew’s consistency, making it a relatively easy pour over method.
Which coffee should you use for a pour over? Any coffee you like, but as a method that is perfect for highlighting flavours from origin and is a great opportunity to explore different lightly roasted micro lots with bright and acidic flavours. Light roast coffee is able to better retain the flavours from the coffee, without being masked by the taste of roasting.
Coffee brewed for pour over can be used within a few days of roasting. Lyndon M. Realubit, owner of Crescendo Coffee Roasters who is based in the Philippines, suggests that “in my experience, five days after the roast date is okay for filter, but this peaks after 14 days”. This is down to preference, so have a go yourself trying different dates after roasts.
For V60, grind your beans to between medium and coarse, or to the consistency of granulated sugar. For the Chemex and Kalita Wave, grind it a little coarser, in between granulated sugar and rock salt. Lyndon also suggests buying a “decent powered burr grinder”, which will ensure a consistent grind throughout. Consistency in the grind stops rogue large or small granules of coffee, which interfere with the brew by creating an uneven extraction nad can leave the coffee tasting unpleasant.
A starting point for the brew ratio is 1:17, 1g of coffee for 17g of water. This can be changed according to the coffee and to taste preferences. If you find your coffee is tasting acidic or sour, try making the grind a little finer. If it tastes slightly bitter, try making the grind size a little more coarse.
To brew your coffee, first, take your filter paper, fold and place in your pour over brewer. Use a small amount of water to wet the sides of the paper. If you’re using a Chemex, place it on the scales, if you’re using a V60 or Kalita Wave, place it on a cup or decanter on the scales. Pour in your desired amount of coffee into the filter paper, and set your scales to zero.
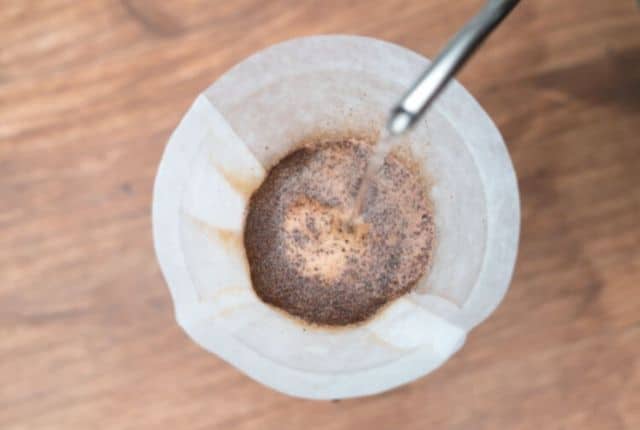
Let the boiling water rest for a minute before using it to brew. If you have a gooseneck kettle, use this to help control the water speed and force. Pour in double the coffee dose, so 30g of water if you’re using 15g of coffee, on the coffee to let it bloom, you’ll see the coffee slightly bubbling. After this, you can use either pulse pouring, where you add water at different points, or continuous pouring while making a pour over. Each will have a different effect on extraction. Avoid solely pouring directly into the middle, instead, doing an outwards spiral.
Decant your coffee, sip, and enjoy the wonderful flavours.
IF YOUR FAVOURITE COFFEE IS ESPRESSO
Brewing espresso at home can be difficult. However, there are a few tips to optimise your home espresso.
Pick your coffees wisely. Although you’ll find light and dark roasts that make a great espresso, a medium roast can be a safe option. Sometimes a light roast is too acidic and a dark roast can taste bitter. Alternatively, look for coffee which is specially roasted for espresso.
Coffee needs to degas after roasting, and due to the high levels of pressure used in brewing an espresso, you need to wait for the coffee to degas before you use it. Most suggest at least a week, Lyndon suggests even “at least 10 days after roasting date” and sometimes more.
Andrés Guevara Chaves, co-founder of El Purica Speciality Coffee Roasters in Germany, highlights the importance of grinding for espresso and suggests that “a good grinder is more important than a machine”. This is because espresso requires a fine grind. The consistency in this fine grind is crucial to a good extraction, as the water flow will be highly impacted if the grind is not consistent.
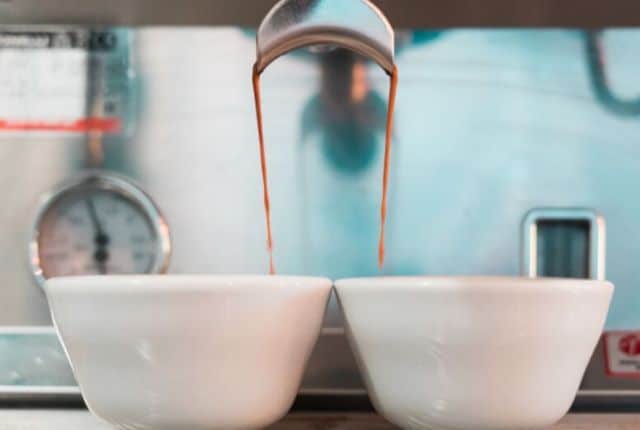
Bear in mind that every coffee needs a different grind; you can’t simply follow one rule for each one. While there is no rule set in stone, a good extraction time to aim for is between 25‒30 seconds. You should also ensure that your shot roughly follows the brew ratio of 1:2, with a brewed coffee weight around double of the dry dose, for example, 18g of dry coffee brewing around 36g of brewed coffee.
It’s all about taste. You will need to try the espresso, and from there adjust the recipe accordingly. Andrés explains, “If your coffee is tasting sour (or acidic), grind finer and increase the extraction. If your coffee is tasting bitter, grind coarser and decrease the extraction.”
Now, you can drink your espresso on its own, top with water or maybe add milk. Home espresso machines may not be as powerful as commercial machines, but there are a few ways to improve your milk.
Clean your steam wand by wiping it down and purging anything that is inside. Pour your milk into your jug and position the steam wand at a 20‒30-degree angle. Position your jug so that only the tip of the steam wand is touching the milk. Start steaming your milk, allowing the milk to aerate as the wand sits at the top. When the milk reaches 37°C/99°F (approximately body temperature), slightly lift the jug by around 1cm and allow the milk to texturise and create a vortex.
The milk shouldn’t exceed 65–70°C/150–160°F, you can judge this when the jug is slightly too hot to touch. Give the jug a swirl and remove any large bubbles, then pour onto your espresso. Maybe give some latte art a try?
TOP TIPS FOR BREWING AT HOME
There are always ways to help improve brewing coffee. Here are some top tips for making coffee at home.
Buy High-Quality Coffee
Michael Boyd, R&D Manager for coffee at Heartland FPG in Indiana, suggests that there are “Seven Steps To Perfectly Brewed Coffee”, number one being “Coffee, start with good quality”. At the end of the day, it’s coffee that you’re making so good-quality coffee is one of the best places to start.
It’s worth researching coffees which work well with your chosen brew method. Andrés also suggests “trying varieties, origins and processing methods” to discover which coffee you like and to learn to brew at home.
Check The Roast Date
Coffee, like all foods, will lose its freshness and flavour over time. Therefore, if your coffee is fresh, you can expect to get better results.
Lyndon tells me that coffee will peak after roasting, and suggests, depending on brew method, to opt for “freshly roasted coffee from one week to one month from the date of roasting”. Investigate this yourself, and work out when after roasting that you enjoy the coffee most.
Michael similarly tells me using “always fresh coffee” and adds “store it in an airtight container in a cool dry place”. While coffee is at its best, it will retain its flavours in places with low moisture content, and out of the sun. This will help retain the freshness for a good cup of coffee.
Invest in a Grinder
Angelo Pacana, Head of Coffee Quality Control at Habitual Coffee in the Philippines, emphasises that “you don’t need to buy fancy brewers that cost a lot. But if you do have the budget, invest on a grinder and start there.”
It is an easy step to take and can make a huge difference in the quality of the coffee. Pre-ground coffee will lose its freshness quickly, resulting in a lack of flavour and stale taste.
Always be aware of which grind size you should be aiming for, depending on which brew method you are using. Coffee can end up under-extracted or over-extracted if the grind size is incorrect, which can result in bitter or sour coffee.
Similarly, a good grinder can make a lot of difference ensuring that there is consistency throughout the grind. Rogue larger or smaller granules will interfere with a smooth extraction and leave your coffee tasting bitter or sour, so a high-quality grinder is preferable, if possible.
Keep Brew Equipment Clean
It’s something that we do in every other part of our life and must be remembered in brewing too. Spencer Turer, Vice President of Coffee Enterprises in Vermont, says, “Always start with a clean brewer in like-new condition. Never use a filthy coffee brewer or brew basket. You wouldn’t cook your meal in a dirty pot – don’t brew your coffee in a dirty brewer.”
This is a quick-fire way to change the way you’re brewing. Make these changes and see how different your brew tastes.
Measure Your Brews
Andrés tells me “measure everything”. This includes the weight of your coffee and water to temperature and time. The more specific you can be while brewing, the better results you can expect.
This way you can create your own recipes and learn what you might have to do when you try out a new coffee.
Alter Your Water Quality
Water makes up the majority of a coffee, which is why it can have such an impact on flavour. Syahirah Halim, ex-barista at Patricia Coffee Brewers in Melbourne, explains that “the hardness of water is key as compounds present in water such as magnesium, calcium, and bicarbonate affects how the coffee will taste.”
If you want to get scientific, investigate what levels of compounds are present in your water and what the pH level is and how this affects the taste of your coffee. A pH level of seven is neutral, so aim for this.
Play With Your Brew Recipe
It is always good to have a starting point, so follow suggested brew recipes and ratios. Look into what these are from this article, or look around for alternatives. But remember, it’s always down to you and your taste preferences. Learn from the process and enjoy it.
A good cup of coffee can brighten up your day. Luckily, you can brew a great cup yourself, at home. Not only can you enjoy the drink itself but also begin to understand the science behind brewing, how different coffees taste, and what you like and why.
It’s time to discover coffee origins, create your own opinions, and most importantly, sit down and enjoy your delicious cup of coffee.
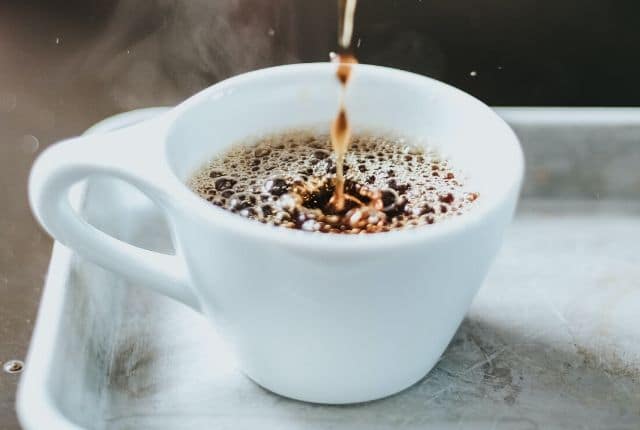
Written by Helena Brown. Featured photo caption: Filter coffee being poured into a cup. Featured photo credit: Jean Pierre Flores
Original article made by : Perfect Daily Grind